1. scrap.csv This is a CSV file that contains the list of items to be weighed. Each line of the file must contain the item name:
<item_name>
For example, a business that is involved with meat products may contain the following lines in its scrap.csv file:
beef brisket
beef rib
beef short loin
beef sirloin
beef tenderloin
pork bacon
pork belly
pork chops
2. supplier.csv This is a CSV file that contains the supplier list. Each line of the file must contain the following:
<supplier_name>
Again, as an example of a business involved in meat products, the file may contain the following lines:
Century
CDO
King Sue
Purefoods
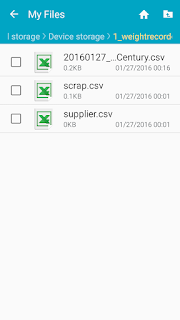
Open Timbang for the first time creates a directory "1_weightrecorder" in the device’s internal storage.
Copy the CSV files in 1_weightrecorder.
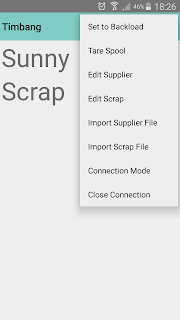
Tapping the three vertical dots on the upper right corner of the screen reveals the menu. Tap "Import Supplier File", and "Import Scrap File". The CSV files are loaded into the app's internal storage. After doing this, you may delete the CSV files.
As a company goes along, suppliers, and items may change. You may edit suppliers by opening the menu, and tapping "Edit Supplier". A list of supplier names appears. To add a supplier, tap the plus icon on the upper right of the screen, and the "Add Supplier" dialog appears. Fill up the name fields, and press "OK".
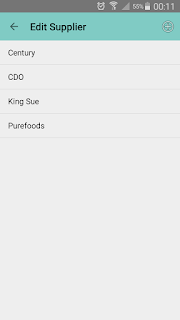
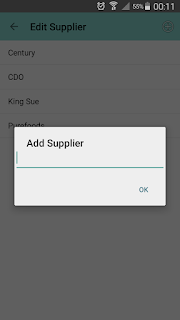
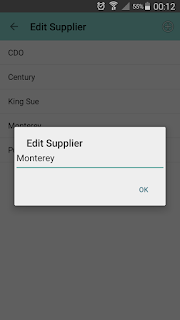
To change a supplier's name, long press the supplier entry in the "Edit Supplier" screen to show a context menu with "Edit", and "Delete". Tap "Edit" to show the "Edit Supplier" dialog, which is similar to "Add Supplier" dialog. Edit the name, and press "OK". The supplier entry is updated.
You may also delete suppliers by long pressing the supplier entry, and selecting "Delete".
Editing item entries is similar to editing suppliers. You may start editing items by selecting "Edit Scrap" at the menu of the main screen, and following similar steps as editing suppliers.
Select the connection type by tapping the menu icon, and selecting "Connection Mode". A dialog box will appear prompting you to select how you want to connect to the weighing scale.
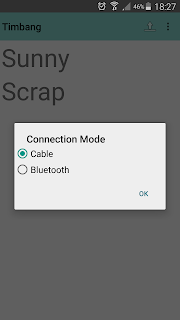
Now you're ready to receive weight from the scale. Connect the cables:
1. Connect the null modem to the scale's RS232 port.
2. Connect the RS232 to USB cable to the modem.
3. Connect the USB OTG to the RS232 to USB cable.
4. Finally, connect the USB OTG to the phone.
5. Press "Connect" (the upload button beside the menu icon's 3 vertical dots). The app is now connected to the scale.
You may also connect via Bluetooth by:
1. Pair the bluetooth device in the device's bluetooth settings.
2. Press "Connect" (the upload button beside the menu icon's 3 vertical dots).
3. Choose the bluetooth device (in our case it's an RS232 to bluetooth dongle).
4. A message will appear that the connection is successful.
Choose the supplier. You may do this my tapping on the supplier name. A generic "Select Item" dialog box appears where you can select the supplier from a list. You may do the same when choosing the item.
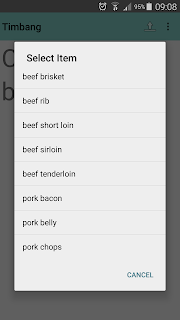
Put in the item to be weighed, and wait until the weight stabilizes, then press the "Print M+" button on the scale. The item name along with its weight appears on the app's main screen.
The item, and weight is also recorded in a CSV file named after the time "Print M+" is first pressed, and the supplier's name.
yyyymmdd_hhmmss_<supplier_name>.csv
This CSV file is located at 1_weightrecorder.
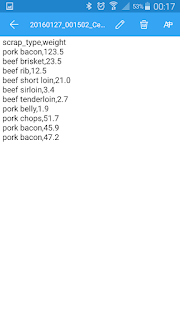
If you need to delete the item, long press the item entry for the context menu to appear. Select "Delete", and the item will be removed from the main screen, as well as from the CSV file.
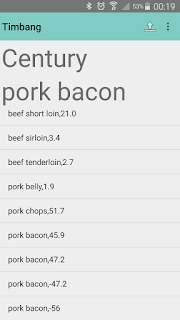
Sometimes, you have to return items back to suppliers, and thus the weight should be negative. You may do this by choosing "Set to Backload" in the menu. Notice that pork bacon's weight is negative.
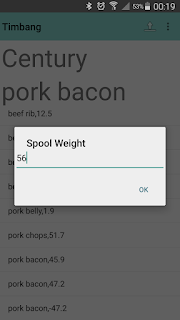
In our line of business, which is recycling of plastic, suppliers bring neat rolls of plastic. Since we only accept plastic, we deduct the weight of the spools these rolls, much like the core of a toilet paper. However, we don't necessarily weigh them one by one. To deduct the weigh of the core, choose "Tare Spool" from the main menu, and a dialog box asking for the spool weight appears. Input the weight, and this comes out as a deductible weight.
After the weighing session is through, select "Close Connection" from the main menu to terminate the connection between the app, and the weighing scale.
As for the weighing scale, the FIO3 indicator's serial port setting (F16), should be set as such:
BAUD: 9600
PARITY: none
BITS: 8
AC: off
CH: off
ST: yes
FR: 20d
LAB: 2
COPY: 1
The serial bluetooth dongle should be set to DCE (IF).


No comments:
Post a Comment