1. item.csv This is a CSV file that contains the item list. Each line of the file must contain the following:
<item_name>,<item_code>,<unit>
For example, a business that is involved with groceries may contain the following lines in its item.csv file:
Bears Brand Powdered Milk 33g,BB33,case
Bears Brand Powdered Milk 80g,BB80,case
Cofimate Original 80g,CM80,case
Cofimate Original 170g,CM170,case
Nescape 3in1 Brown N' Creamy,NESBRN,case
Nescape 3in1 Creamylatte,NESCRM,case
It is recommended that item codes are short, so that it does not take too much character space in the SMS the app sends.
2. customer.csv This is a CSV file that contains the customer list. Each line of the file must contain the following:
<customer_name>,<customer_code>
Again, as an example of a business involved in groceries, the file may contain the following lines:
Seven Eleven Twelve,7112
Mini Go,MINGO
Lawton,LAW
Family Supermart,FAM
Puresilver,PUR
Shopsmart,SHOP
Similar to the reasoning in item.csv, it is recommended to keep customer codes short.
Open Alice, and a directory "2_alice" at internal storage is created.

Copy the CSV files in 2_alice.

Open Alice. Tapping the three vertical dots on the upper right corner of the screen reveals the menu. Tap "Import Client File", and "Import Item File". The CSV files are loaded into the app's internal storage. After doing this, you may delete the CSV files.

Before using Alice, the mobile phone where the SMS orders shall be sent must also be set. Do this by opening the menu again, and tapping "Edit Send Number". The phone's directory opens, where you can select the contact to send the orders.

Once setup (importing item and client files, setting the send number) is complete you may start using Alice.
Selecting a customer is easy. Just type the customer name at the text box on the screen. It is autocomplete, so once suggestions appear after two characters are typed, select the customer name. You won't be able to send SMS orders if clients are not selected from the suggestions.

Adding orders is done

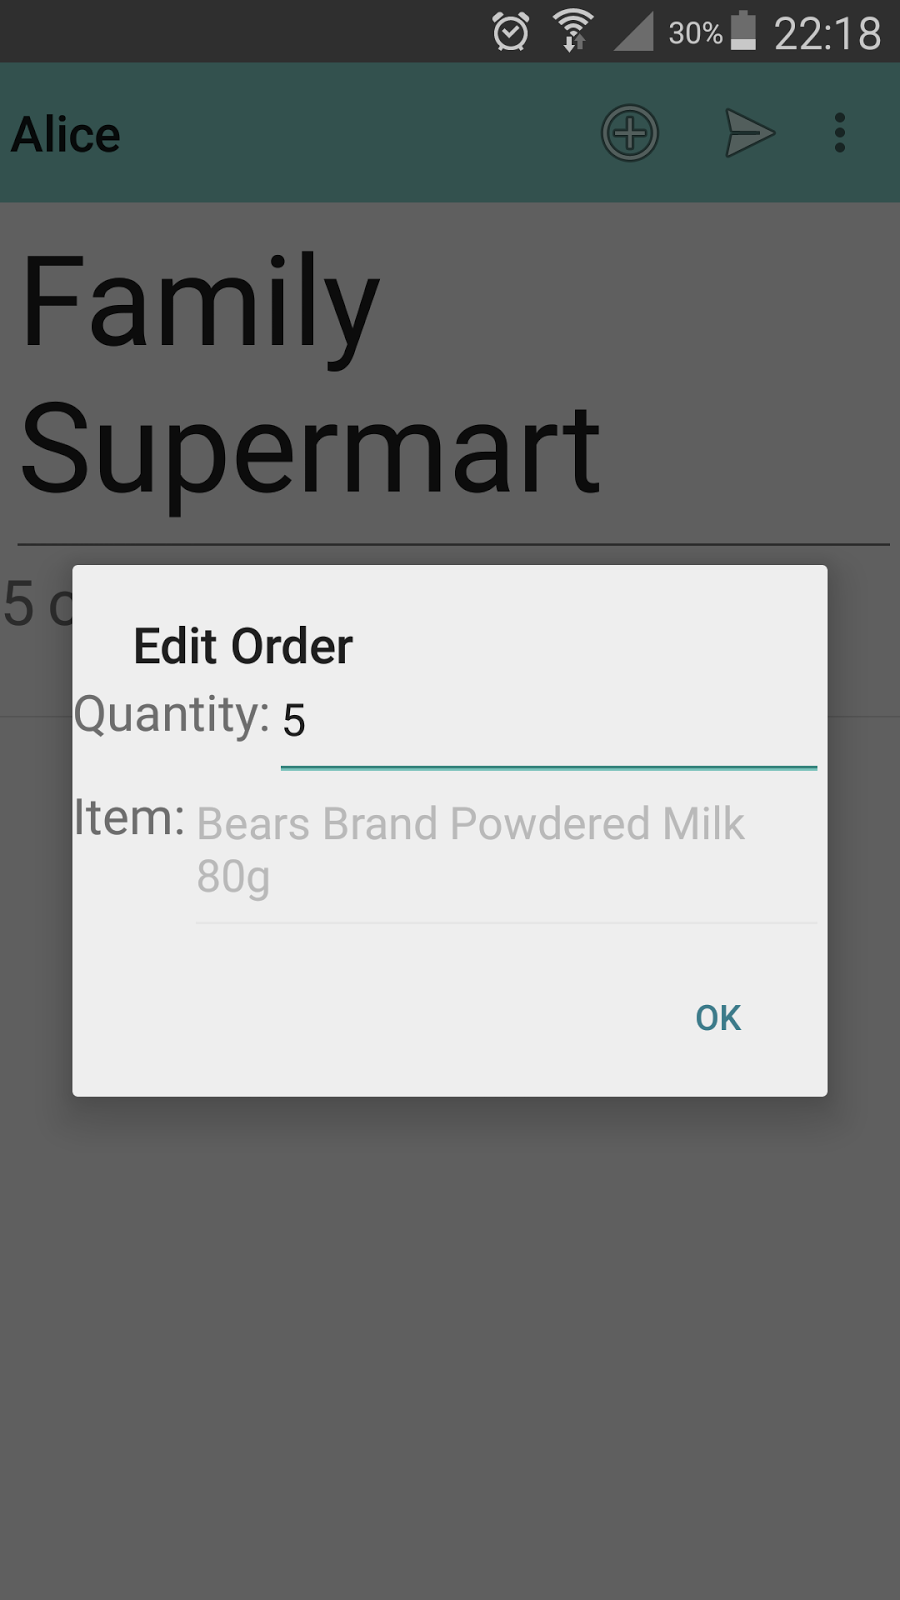
You may change the order quantity by long pressing an order to make a context menu appear, and tapping "Edit". A dialog box "Edit Order" appears. Edit the quantity, and press "OK".

Delete an order by selecting "Delete" from the context menu.
When you're done with taking a customer's order, and you're ready to send the orders to the main office, just tap the paper airplane icon, or open the menu and tap "Send". A message confirming the orders are sent through SMS appears.

<customer_code>
<quantity>-<item code>
or a more concrete example is:
71112
3-BB33
7-CM170
1-NESCRM
which means client Seven Eleven Twelve ordered:
3 cases of Bears Brand 33g
7 cases of Cofimate Original 170g
1 case of Nescape 3in1 Creamylatte
As a company goes along, clients, and items may change. You may edit clients by opening the menu, and tapping "Edit Client". A list of client names, and client codes appears. To add a client, tap the plus icon on the upper right of the screen, and the "Add Client" dialog appears. Fill up the name, and code fields, and press "OK". Not filling up one of them cancels the addition process.


To change a client's name, or code, long press the client entry in the "Edit Client" screen to show a context menu with "Edit", and "Delete". Tap "Edit" to show the "Edit Client" dialog, which is similar to "Add Client" dialog. Edit the fields you want, and press "OK". The client entry is updated.


You may also delete clients by long pressing the client entry, and selecting "Delete".
Editing item entries is similar to editing clients. You may start editing items by selecting "Edit Item" at the menu of the main screen, and following similar steps as editing clients.


Exit the app by doubling tapping the back button.

No comments:
Post a Comment